Today we learned about
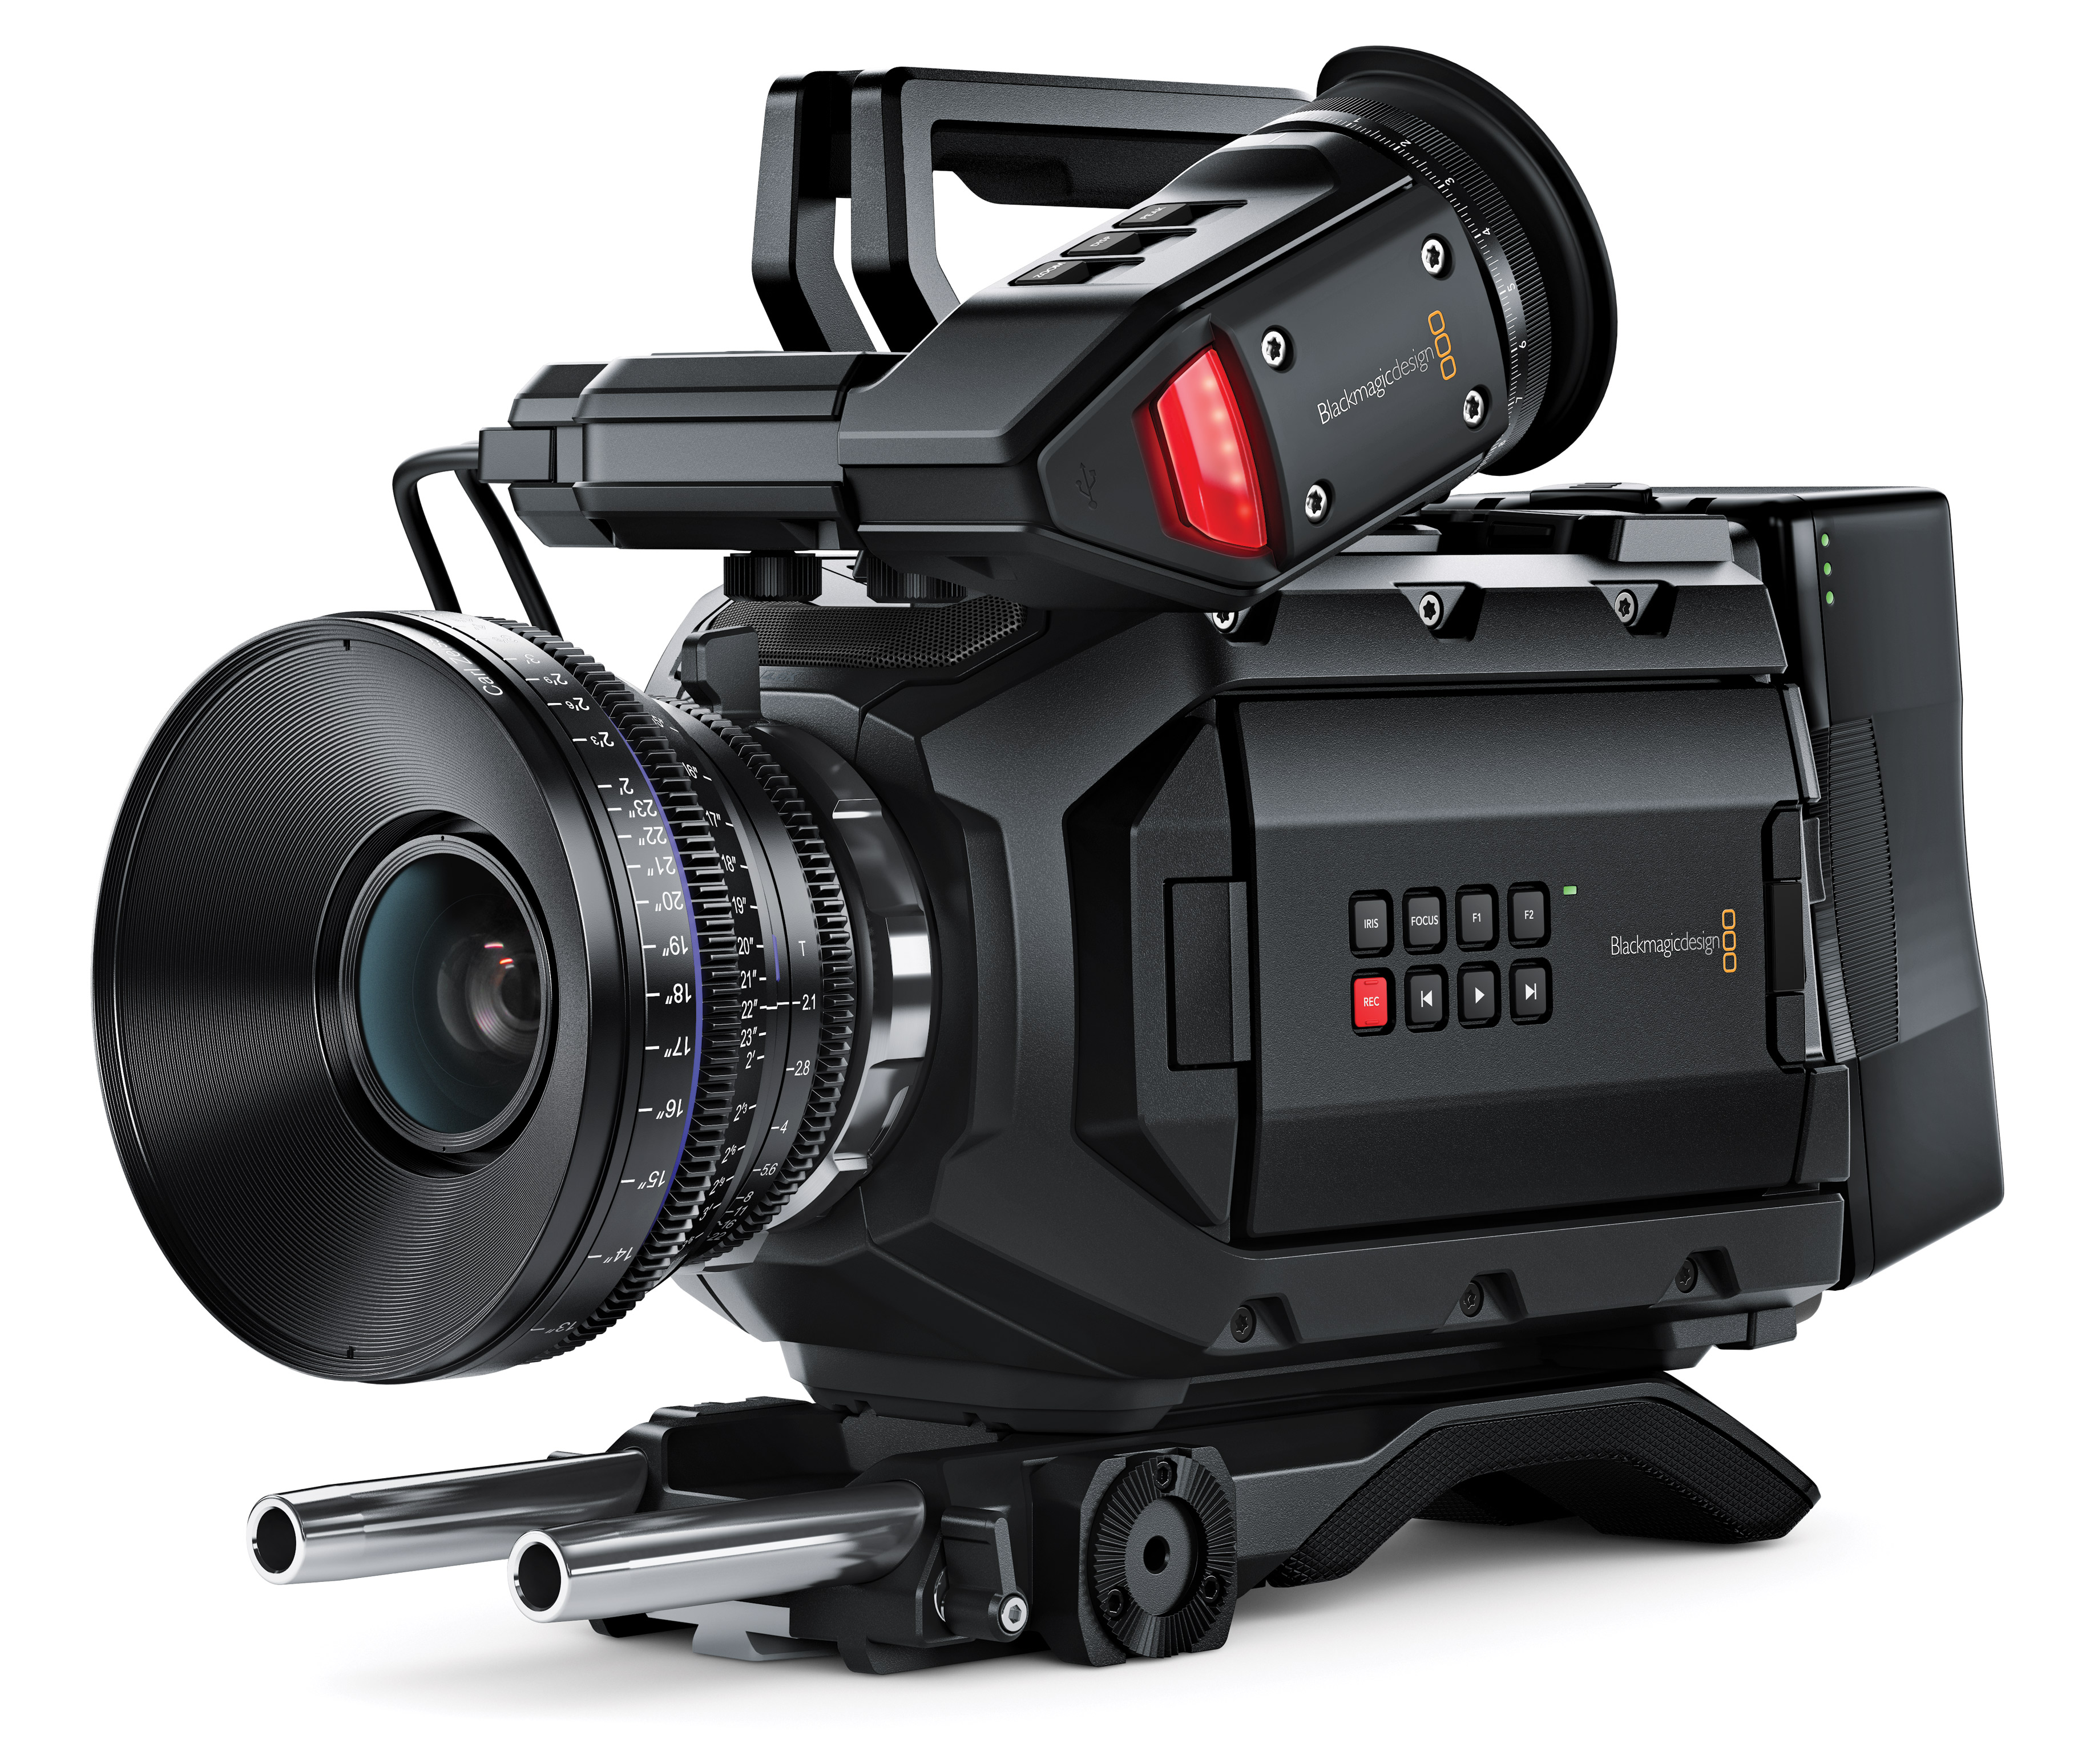
how to set up a Black Magic mini ursa film camera. As a group we set up the tripod and
levelled the spirit level to make sure the tripod was stable and not tilted.
Pushing a button and sliding it on and tightening with another screw attached
the camera. Then we attached the battery pack with a satisfying click. We then removed the lens cap, turned on the camera and looked into the viewfinder to see our surroundings. We
were directed to zoom all the way into our subject by the teacher and focus by
turning the dial on the lens. Then when you zoom out, the subject will still be
in focus.
If the exposure is too
much, you scroll a wheel on the lens to adjust it to the correct lighting, this
wheel was very stiff. The ISO is the meter on how sensitive the camera is to
light, and this should always be at 400. Shutter angle (SA) changes the
blurriness of a moving subject. This is usually at 180 but if any lower the
subject will be less blurry. This is well suited for action films, as the
movement has to be sharp to have an impact on the audience. The exposure is
darker the lower you make the SA. The white balance makes the temperature of
the video either warmer or colder. 5600K to 6600K (K means Kelvins) are well
suited to outdoors scenes as it makes the scenery look more normal by making
the video footage colder. 3200K is better for indoor scenes.


No comments:
Post a Comment